
Tissue processing is a critical technique in histopathology that prepares tissue specimens for microscopic examination. Through this meticulous process, samples are preserved, allowing pathologists to examine cellular structures for the diagnosis of various diseases.
Introduction
What is Tissue Processing?
Tissue processing in histopathology refers to the systematic procedure of preparing tissue samples for microscopic examination. This process involves several essential stages, each serving to preserve the integrity of the tissue while ensuring it remains in a state suitable for staining, sectioning, and analysis. Tissue processing is essential for accurate diagnoses, whether in clinical settings, medical education, or research.
Importance in Histopathology
Histopathology is a crucial branch of pathology that involves the study of tissue changes caused by disease. Tissue processing enables pathologists to examine tissue specimens accurately, identify abnormalities, and make informed decisions about medical diagnoses. This procedure is foundational for diagnosing cancer, infections, and various other medical conditions.
Who Uses It?
Tissue processing is used across various fields, including:
- Diagnostic Labs: To prepare patient samples for pathological examination.
- Medical Education: To teach students how to identify cellular structures and understand diseases.
- Research: To study tissue morphology, cellular behavior, and disease mechanisms, often in molecular pathology and immunohistochemistry.
Objectives of Tissue Processing
Tissue processing serves multiple purposes aimed at preserving tissue integrity and enabling clear examination. Below are the key objectives of the process:
Preservation of Tissue Morphology
The primary goal of tissue processing is to maintain the tissue’s original structure. This ensures that cellular structures remain intact, allowing pathologists to examine them in detail.
Facilitation of Microscopic Examination
Tissue processing facilitates detailed examination by making the tissue suitable for staining and sectioning. This ensures that pathologists can observe cellular components and diagnose diseases accurately.
Prevention of Autolysis and Decomposition
Fixing the tissue prevents autolysis (self-digestion) and bacterial decomposition, which could alter or destroy the tissue’s structure, rendering it unsuitable for examination.
Step-by-Step Tissue Processing Procedure
Tissue processing involves several critical steps, each of which is designed to prepare the tissue specimen for microscopic examination. These steps must be carried out with precision to ensure high-quality results.
1. Fixation
Definition and Purpose:
Fixation is the first step in tissue processing, involving the preservation of tissue structure by halting enzymatic activity and preventing decomposition. The goal is to preserve both the tissue’s architectural details and cellular integrity.
Common Fixatives:
| Fixative | Composition | Applications | Strengths | Limitations |
|---|---|---|---|---|
| Formalin (10% NBF) | Formaldehyde, phosphate buffer | Routine histology, biopsies, tumor specimens, general tissue preservation | Widely used, preserves general tissue structure well | Can interfere with immunohistochemistry (IHC) if overused or improperly buffered |
| Glutaraldehyde | Glutaraldehyde (cross-linking agent) | Electron microscopy, cell ultrastructure, organelles (e.g., mitochondria) | Excellent for preserving fine cellular structures | Highly toxic, requires careful handling, expensive compared to formalin |
| Bouin’s Solution | Picric acid, formalin, acetic acid | Connective tissue, muscle fibers, reticulin, nervous tissue | Excellent for special staining (collagen, elastin) | Extremely toxic due to picric acid, requires careful handling and disposal |
| Alcohol-Based Fixatives | Ethanol, methanol | Cytogenetics, RNA/DNA preservation, smear preparations (blood, bone marrow) | Preserves nucleic acids well, good for molecular biology | Tissue shrinkage and distortion, not ideal for general histological studies |
| Acetone | Acetone | IHC, enzyme preservation, antigen preservation for molecular assays | Quick fixation, good for preserving antigens | Tissue shrinkage, distorts cell morphology if overused |
| Osmium Tetroxide | Osmium tetroxide | Electron microscopy, lipid and membrane preservation | Excellent for lipid-rich tissue preservation | Extremely toxic, strong odor, expensive, difficult to handle |
| Carnoy’s Solution | Ethanol, chloroform, acetic acid | Cytogenetics, chromosome preparations, fixing for tissue culture | Quick fixation, excellent for chromosome preservation | Tissue shrinkage, may lose some cellular components (lipids) |
| Zenker’s Solution | Mercury chloride, potassium dichromate, acetic acid | Nervous tissue, muscle specimens, histochemistry studies | Preserves cytoplasmic structures well | Mercury toxicity, over-hardens tissue if left too long |
| Formaldehyde-Free Fixatives | Paraformaldehyde, Histochoice | Alternatives for routine histology, immunohistochemistry, molecular assays | Reduced toxicity, better for IHC and molecular assays | More expensive, less widely used in routine labs |
Fixation Time:
- Small samples typically require 6–12 hours of fixation.
- Larger specimens may need up to 48 hours to ensure thorough fixation.
Why it’s Important:
Proper fixation is essential to prevent tissue degradation. Without it, cellular structures would degrade too quickly, rendering the sample unusable for accurate diagnoses.
2. Dehydration
Definition and Purpose:
Dehydration involves removing water from the tissue through a series of alcohol baths. Water must be removed because it is incompatible with paraffin, which is used in later stages.
Alcohol Concentrations:
- 70% Ethanol: The first alcohol solution, which gently removes water.
- 95% Ethanol: A stronger solution to continue dehydration.
- 100% Ethanol: The final step to ensure all water is removed from the tissue.
Duration:
- Each alcohol stage usually lasts 30 minutes to 1 hour, depending on tissue size.
Effects:
- Dehydration must be gradual, as too rapid dehydration can shrink or distort the tissue.
- Incomplete dehydration can prevent proper clearing and infiltration.
Why it’s Important:
This step ensures that the tissue becomes fully compatible with the clearing agent, which is necessary for the next phase.
3. Clearing
Definition and Purpose:
Clearing replaces the dehydrating alcohol with a substance that is miscible with both alcohol and paraffin wax. This step is essential for rendering the tissue transparent and ready for paraffin infiltration.
Common Clearing Agents:
- Xylene: The most common clearing agent.
- Toluene: A safer, less toxic alternative.
- Limonene: A non-toxic, environmentally friendly option.
Clearing Process:
- The tissue is immersed in the clearing solution for about 30–60 minutes.
- Multiple changes of the solution may be required for complete clearing.
Why it’s Important:
Clearing ensures that the tissue becomes transparent and can adequately accept paraffin during the infiltration process.
4. Infiltration
Definition and Purpose:
Infiltration involves saturating the tissue with paraffin wax, which helps preserve its structural integrity during the cutting process.
Paraffin Infiltration:
- The tissue is placed in molten paraffin (around 55°C to 60°C).
- The tissue is left in paraffin for several hours, during which the wax permeates the tissue.
Temperature Control:
- The paraffin must be maintained at a consistent temperature to avoid damaging the tissue or preventing proper infiltration.
Why it’s Important:
Infiltration with paraffin provides structural support to the tissue, making it firm and easy to section for microscopic examination.
5. Embedding
Definition and Purpose:
Embedding involves placing the infiltrated tissue into a mold filled with paraffin wax, which hardens to form a block. The tissue is carefully oriented to ensure that sections cut from the block will maintain the proper anatomical orientation.
Proper Orientation:
- Tissues must be oriented correctly to ensure diagnostic relevance, especially for large specimens like tumors.
Paraffin Blocks:
- Once the paraffin solidifies, the block is removed from the mold and is ready for sectioning.
Why it’s Important:
Embedding is necessary for providing support and ensuring that tissue sections are uniform and properly oriented during sectioning.
6. Sectioning / Microtomy
Definition and Purpose:
Sectioning involves cutting the paraffin-embedded tissue into thin slices, typically between 3–5 microns thick. The sections are placed onto glass slides for staining.
Microtome Usage:
- The microtome is a specialized instrument used to make uniform, thin slices of tissue.
- Rotary Microtome: Commonly used for routine histology work.
- Freezing Microtome: Used for cutting frozen tissue sections.
Why it’s Important:
The sectioning step is critical for obtaining consistent slices that can be stained and examined under a microscope. Uneven or poorly cut sections can lead to diagnostic errors.
7. Staining
Definition and Purpose:
Staining enhances tissue contrast, allowing pathologists to see cellular structures clearly. The most common staining method is Hematoxylin and Eosin (H&E), but other special stains may be used for specific tissue types.
H&E Staining:
- Hematoxylin: Stains cell nuclei blue or purple.
- Eosin: Stains cytoplasm and other tissue components pink or red.
Special Stains:
- Immunohistochemistry (IHC): For detecting specific proteins or markers in tissues.
- PAS Staining: To detect glycogen and mucins.
Why it’s Important:
Staining is essential for highlighting different tissue components and diagnosing diseases such as cancer. Special stains provide further insights into specific tissue types or conditions.
8. Mounting
Definition and Purpose:
Mounting involves placing a coverslip over the stained tissue on a glass slide to preserve the sample and enhance visibility under the microscope.
Cover-slipping:
- A mounting medium is applied to secure the tissue and prevent drying out. Common media include Canada balsam or synthetic resin.
- A coverslip is placed over the tissue to protect it during examination.
Why it’s Important:
Mounting preserves the tissue for long-term storage and ensures that the sample remains intact during microscopic examination.
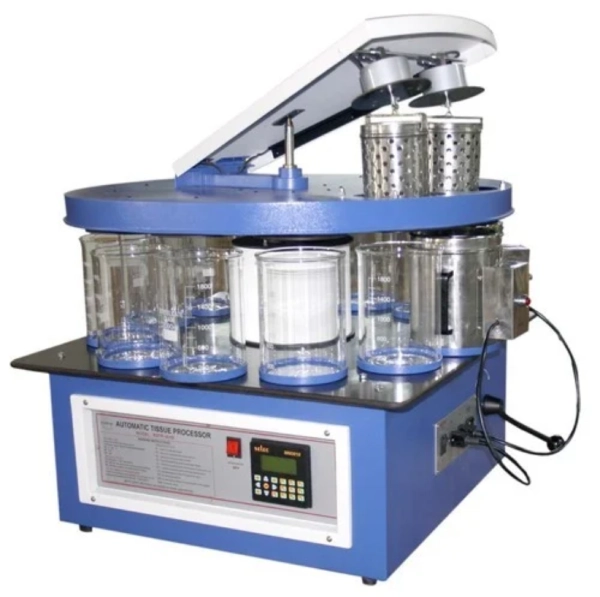
Automated Tissue Processors
Automated tissue processors have become an essential tool in modern histopathology labs. These machines automate the critical steps of tissue processing, including fixation, dehydration, clearing, and paraffin infiltration, improving efficiency, consistency, and reproducibility.
Benefits of Automated Tissue Processors:
- Increased Throughput: Automation allows for the processing of multiple tissue samples simultaneously, improving lab productivity.
- Consistency and Accuracy: Automated systems ensure that each tissue sample undergoes the same processing conditions, reducing human error.
- Time-Saving: By reducing manual labor, automated tissue processors save time, allowing technicians to focus on other tasks.
- Safety: Automated systems reduce the need for manual handling of hazardous chemicals like xylene and formalin, improving lab safety.
Common Automated Tissue Processor Models:
- Leica Biosystems: PELORIS series for high-throughput tissue processing with customizable protocols.
- Thermo Fisher: Tissue-Tek VIP series for large-volume tissue processing with automated reagent management.
- Sakura Finetek: Tissue-Tek AutoTec for advanced software control and ease of use.
Common Challenges and Solutions in Tissue Processing
Tissue processing is a crucial step in histopathology, but it’s not without its challenges. These challenges can lead to poor tissue quality, incorrect diagnoses, and even delays in obtaining results. Below are the most common issues encountered during tissue processing, along with solutions to mitigate them:
1. Incomplete Fixation
Problem:
Fixation is the first step in tissue processing, and inadequate fixation is one of the most common problems encountered. Insufficient fixation can result in poor preservation of tissue architecture, leading to the loss of cellular details that are essential for accurate diagnosis. Furthermore, incomplete fixation may cause tissue distortion, which can compromise downstream processing steps like staining and sectioning.
Causes:
- Short Fixation Time: Tissue samples may not be exposed to fixatives for long enough, leading to incomplete preservation.
- Improper Fixative Use: Using the wrong fixative for the tissue type or using fixatives that have been improperly prepared can result in inadequate fixation.
- Inconsistent Fixation Techniques: Uneven exposure to the fixative due to poor tissue handling or incomplete immersion in the fixative solution can prevent proper preservation.
Solution:
- Ensure that fixation time is appropriate for the tissue type and size. For example, small biopsies typically need 6-12 hours, while larger specimens may require up to 24-48 hours.
- Use the correct fixative for the specific tissue type. Formalin is most commonly used for routine processing, but some specialized tissues may require fixatives like glutaraldehyde or Bouin’s solution.
- Implement standardized fixation protocols for all tissue types, ensuring tissues are fully immersed in fixatives.
- Regularly check the concentration of fixatives and ensure they are freshly prepared.
2. Dehydration Issues
Problem:
Dehydration is another critical step, and improper dehydration can have significant consequences on tissue quality. Inconsistent dehydration can lead to tissue shrinkage, artifact formation, and poor paraffin infiltration.
Causes:
- Rapid Dehydration: Fast dehydration using high concentrations of alcohol can cause tissue shrinkage, resulting in artifacts and loss of fine structures.
- Under-Dehydration: Insufficient dehydration may prevent the proper infiltration of the tissue with clearing agents and paraffin wax.
- Improper Alcohol Solutions: Incorrect alcohol concentrations or prolonged exposure to alcohol solutions can distort the tissue.
Solution:
- Gradually increase the alcohol concentration from 70% to 100% ethanol over several steps. For example, move from 70% ethanol to 95% ethanol, and then to 100% ethanol for complete dehydration.
- Monitor the duration of each alcohol stage, adjusting exposure times based on the tissue type and size. Typically, each alcohol stage should last 30 minutes to 1 hour.
- If dehydration is suspected to be incomplete, repeat the dehydration steps to ensure thorough removal of water.
- Train lab technicians to follow standardized protocols for dehydration and implement automated dehydration systems where possible to maintain consistency.
3. Sectioning Problems
Problem:
Sectioning is one of the most delicate steps in tissue processing. Poor sectioning can result in uneven cuts, tearing, and cracking of the tissue, making it difficult to evaluate under the microscope.
Causes:
- Improper Embedding: If the tissue is not embedded correctly or oriented improperly during embedding, it can lead to uneven sectioning.
- Inadequate Paraffin Infiltration: If the tissue is not sufficiently infiltrated with paraffin, it may be too soft or brittle for successful sectioning.
- Inconsistent Sectioning: Using improperly calibrated microtomes or poor sectioning technique can lead to uneven slices.
Solution:
- Ensure proper embedding with correct orientation of the tissue. The tissue should be aligned in the embedding mold such that the most diagnostically relevant areas are sectioned.
- Use high-quality microtomes and calibrate them regularly to ensure consistent section thickness.
- For difficult tissues such as fatty or fibrous tissues, consider using specialized embedding media or frozen section techniques.
- Properly maintain paraffin temperature during infiltration to ensure it remains fluid enough for complete infiltration but not too hot to cause tissue damage.
- Incorporate automated sectioning systems where possible to ensure uniformity in section thickness and improve reproducibility.
Quality Control in Tissue Processing
Quality control (QC) is essential in tissue processing to ensure that the procedure consistently delivers high-quality tissue specimens for diagnostic purposes. QC ensures that the integrity of the tissue is maintained throughout the entire process, reducing the risk of errors and improving diagnostic accuracy.
1. Standard Operating Procedures (SOPs)
Description:
Standard Operating Procedures (SOPs) provide a detailed set of instructions for performing each step of the tissue processing procedure. Adhering to SOPs ensures that each tissue sample is processed consistently, reducing variability and errors.
Implementation:
- Develop and maintain clear and comprehensive SOPs for each stage of tissue processing (fixation, dehydration, clearing, infiltration, embedding, sectioning, staining, and mounting).
- Train laboratory staff to follow SOPs rigorously. This helps standardize procedures and reduces the likelihood of human error.
- Regularly review and update SOPs based on new research findings, technological advances, and feedback from laboratory personnel.
Why it’s Important:
SOPs ensure uniformity across all laboratory activities, which is essential for producing reliable and reproducible results. They also provide a framework for troubleshooting issues and maintaining consistency.
2. Equipment Calibration
Description:
Regular calibration of equipment used in tissue processing ensures that instruments perform within their optimal range, producing accurate and reliable results.
Implementation:
- Calibrate microtomes, embedding stations, and other critical equipment regularly to ensure proper functioning.
- Use calibration standards provided by the manufacturer or recommended by professional organizations to validate equipment accuracy.
- Implement automated quality control systems where possible to monitor equipment performance and alert lab technicians to potential issues.
Why it’s Important:
Proper equipment calibration prevents equipment failure that could compromise tissue quality. Regular maintenance ensures that all instruments are functioning at their best, reducing the risk of tissue processing errors.
3. Role of Technicians and Pathologists
Description:
Laboratory technicians and pathologists play a pivotal role in overseeing the tissue processing process. Technicians handle the samples, while pathologists review the processed tissue to ensure it meets diagnostic standards.
Implementation:
- Technicians should be trained to handle tissue samples with care, following all safety protocols and ensuring that each stage of processing is performed correctly.
- Pathologists should examine processed tissue samples to assess their quality, flagging any problems and ensuring that the specimens are suitable for diagnosis.
- Collaboration between lab technicians and pathologists is critical for ensuring high-quality tissue processing. Regular feedback loops help improve lab practices and address any recurring issues.
Why it’s Important:
Skilled technicians and pathologists are essential for detecting issues early in the tissue processing workflow. Their expertise ensures that problems are addressed before they affect the quality of the diagnostic results.
Applications of Tissue Processing
Tissue processing is a vital technique with broad applications in clinical diagnostics, medical education, and research. The processed tissue provides a detailed and preserved representation of cellular structures, allowing for a wide range of uses.
1. Clinical Diagnosis
Description:
Tissue processing plays an indispensable role in the diagnosis of diseases. It enables the study of tissue samples under a microscope, which is crucial for diagnosing conditions such as cancer, infections, and inflammatory diseases.
Applications:
- Cancer Diagnosis: Tissue biopsies are processed to detect malignancies and study their morphology for staging and treatment planning.
- Infection Diagnosis: Pathogens can be identified through histological examination of tissue samples.
- Chronic Diseases: Tissue processing helps in the diagnosis of chronic conditions like autoimmune diseases and degenerative diseases.
Why it’s Important:
Accurate tissue processing ensures that clinicians can make informed decisions regarding patient treatment plans based on histopathological examination.
2. Medical Education
Description:
Tissue processing is a cornerstone of medical education, allowing students to study real-life tissue samples and learn about the structure and function of cells and tissues.
Applications:
- Histology Labs: Students study processed tissue samples to understand cellular structures and the effects of diseases.
- Pathology Training: Aspiring pathologists use processed tissue to learn diagnostic techniques and interpret histological slides.
Why it’s Important:
Tissue processing provides students with hands-on experience in tissue examination, fostering deeper learning and understanding of medical concepts.
3. Research
Description:
Tissue processing plays a crucial role in medical and scientific research, particularly in molecular pathology, immunohistochemistry (IHC), and other advanced techniques.
Applications:
- Molecular Pathology: Tissue samples are processed for genetic and molecular analysis, allowing researchers to study disease mechanisms at a molecular level.
- Immunohistochemistry (IHC): Processed tissues are used to detect specific biomarkers, providing valuable insights into disease pathology and therapeutic targets.
Why it’s Important:
Tissue processing enables researchers to study diseases at a cellular and molecular level, leading to advancements in treatments and therapies.
Frequently Asked Questions (FAQ)
What are the steps in tissue processing?
Tissue processing includes fixation, dehydration, clearing, infiltration, embedding, sectioning, staining, and mounting.
Why is tissue processing important in pathology?
Tissue processing preserves tissue integrity, prevents degradation, and ensures samples are prepared for microscopic examination, which is essential for accurate disease diagnosis.
How long does tissue processing take?
Tissue processing can take anywhere from several hours to a full day, depending on the size and complexity of the specimen, as well as the specific protocol used.
What is the most common fixative used?
The most commonly used fixative for tissue preservation is formalin (10% neutral-buffered formalin), which effectively preserves tissue structure by cross-linking proteins.
What is the purpose of dehydration in tissue processing?
Dehydration removes water from the tissue, replacing it with alcohol to prepare the tissue for the clearing step, which is necessary for paraffin infiltration in the subsequent stages.
How are tissue samples sectioned?
Tissue samples are sectioned using a microtome, which slices the paraffin-embedded tissue into thin sections (usually 3–5 microns thick) for mounting and staining.
What is the role of staining in tissue processing?
Staining enhances tissue contrast, allowing pathologists to differentiate between various cellular components and tissues under a microscope, aiding in the identification of abnormalities.
How are tissue samples mounted?
After staining, tissue sections are mounted on glass slides with a mounting medium, and a coverslip is placed to protect the sample for long-term preservation and ease of examination.
What common problems occur during tissue processing?
Common issues include incomplete fixation, dehydration problems, and sectioning errors such as tearing or uneven sections. These can be minimized by following standardized protocols and using properly calibrated equipment.
Can tissue processing be automated?
Yes, automated tissue processing systems can streamline the procedure, improving efficiency, consistency, and accuracy in labs with high sample volumes.
References
- Bancroft, J. D., & Gamble, M. (2008). Theory and Practice of Histological Techniques. Churchill Livingstone.
- WHO. (2020). Histopathology: Methods and Techniques. World Health Organization.